The use of monitoring solutions during the process could take the place, or at least reduce, the amount of post-production inspections that are needed and provide an increased confidence in build quality. This type of software innovation will be instrumental in driving AM forward into a fully industrialized technology.
Author: Mathieu Roche, Software Manager, AddUp
It’s no wonder why AM has caused such a disruption in the manufacturing industry over the past decade. The ability to produce complex geometries that cannot be achieved with conventional manufacturing processes coupled with short timelines and often at reduced cost, AM offers many reasons to be top of mind across a variety of industries. However, a gap exists on the path to mass adoption of this technology: quality assurance. When a part is produced via AM, many post-production inspections must occur to ensure its conformity and compliance with geometric tolerances, its level of porosity, detection of defects and its reproducibility. Most of these inspections are carried out on coupons and samples included on the production layout and produced under the same conditions as the main parts. These samples are then tested to check porosity level, fatigue, and many other aspects to fit contractor expectations. However, there representation of your primary part and the associated quality can be limited, especially when considering the use of multi laser production. On top of this, these checks are often expensive and lengthy which can impact lead time and productivity.
AM, and more particularly, PBF, is well suited for the use of monitoring solutions during production. With an average of 60 µm layer thickness, a typical production will require about 3000 successive layers to be complete. On paper, it seems like a slower process compared to conventional manufacturing processes, but in addition to all the AM benefits already well known, like complex geometry, lead time… the successive fusions of these thin layers of material offer a unique perspective on the state of the part during manufacturing. The use of monitoring solutions during the process could take the place, or at least reduce, the amount of post-production inspections that are needed and provide an increased confidence in build quality. This type of software innovation will be instrumental in driving AM forward into a fully industrialized technology.

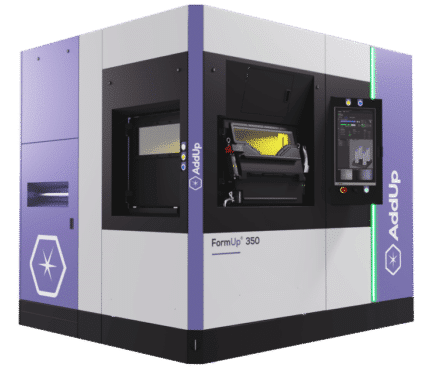
AM is a pretty complex technology to master because of the various scales we have to deal with: generating millions of vectors corresponding to miles of trajectories, at a speed of several meters per seconds being drawn by a “pencil” having a diameter of a hair. In addition, dozens of components such as the platform, Laser, air flow for inerting conditions will all have to work together to create the part as expected. For these reason a single tiered approach to in process monitoring would be inadequate in providing the level of quality assurance demanded from a fully industrialized technology. AddUp’s full suite of monitoring solutions were designed and built to reap the full potential of the FormUp® 350 Powder Bed Fusion (PBF) machine. At the heart of AddUp’s monitoring strategy are 3 key elements.
The first is a macro view of what is occurring inside the machine. AddUp’s FormUp® 350 PBF machine has dozens of sensors collecting data in real time: oxygen level, humidity level, state of lasers, forces measured in all moving components, consumption of powder, gas flow, etc. In the past, these data sets were incomplete and only consolidated after production, limiting the potential action during production. But now, it can be visualized in real time on an intuitive platform called: AddUp Dashboards. Collecting and evaluating this data can provide a powerful indication on the quality of the part, offering a complete understanding about production conditions.
This solution can also be tailored to meet the different needs of the varying manufacturing roles. Maintenance personnel will track drifts for moving components and follow firmware and software update.Manufacturing leaders will follow the load of their workshop and make sure they do not encounter any bottlenecks or supply chain disruptions. Quality experts will have access to a Build Report which includes every single event during production, with an OK / INCOMPLETE / FLAG status automatically generated. Finally, process experts will have full control over dozens of variables, with advanced features to cross reference Key Process Parameters or KPPs. It’s important to note that all this data is fully compliant with the highest traceability standards thanks to AddUp GUID system which tracks from start to finish the conformity of the production file.
But all of this is only the first step.
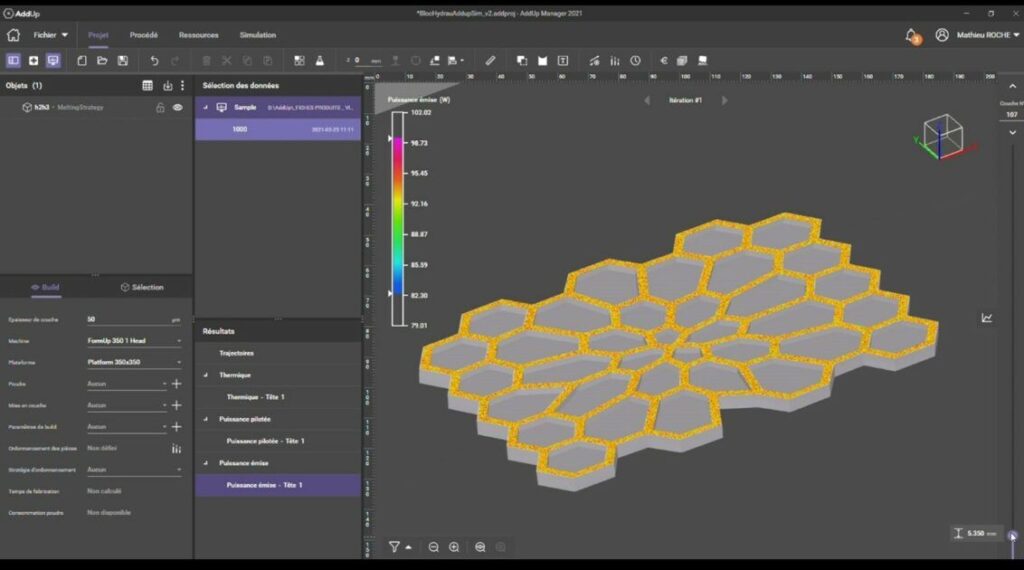
The next step is analyzing the execution of the production, but on a microscopic scale. AddUp measures KPPs at a very high frequency: physical position of the laser spot, actual power delivered by the laser and the emissivity of the melt pool. Meltpool Monitoring makes it possible to characterize any defects without destroying the part, which is specifically useful for unique one-off builds. The volume of data generated using this monitoring solution can be very large, that’s why AddUp offers a set of PNG files, a lighter and easier to read format than raw data, which can be visualized in AddUp Manager, the CAM solution dedicated to FormUp. These visualizations are provided in real time after each subsequent layer. These pictures are automatically repositioned and overlaid to the nominal scan strategy, allowing for comparison with expected trajectories. For mass production, this type of monitoring can be used to create a reference fingerprint which can be used as a point of comparison for future production builds.
Meltpool Visual Data

Finally, the last key element in the AddUp monitoring suite is the analysis of the quality of the layering. AddUp’s innovative technology (Recoat Monitoring) proactively corrects faults during production. This element was designed to improve productivity of parts. As explained earlier, AM is based on the generation of several thousand of successive layers. When the quality of powder bed is bellow standards, due to any number of issues, several hours into production it has the potential to fail the build. The impact can be dramatic. AddUp’s Recoat Monitoring system not only checks the homogeneity of the powder bed, revealing the possible presence of deposits or lack of powder, but it also triggers a correction sequence when necessary, making sure powder bed will be nice and smooth before melting resumes. These recoating corrections are fully tracked and reported in AddUp Dashboards and in every part Build Report.
The combination of these 3 key elements will accelerate the adoption of the technology by not only giving confidence in the quality of parts without defects in limited run applications but in mass production of AM parts.
